
Apache HTTPD 테스트용 Centos7 구성 - 1차
로컬 PC로 가상머신을 커맨드라인 명령을 통해 진행 할 수 있을까?
[목표]
- Hyper-V Nat 네트워크 구성을 활용하여
- CentOS7을 Hyper-V에 설치 해 보자
[사전준비]
- Windows10 Hyper-V Nat Network 구성하기
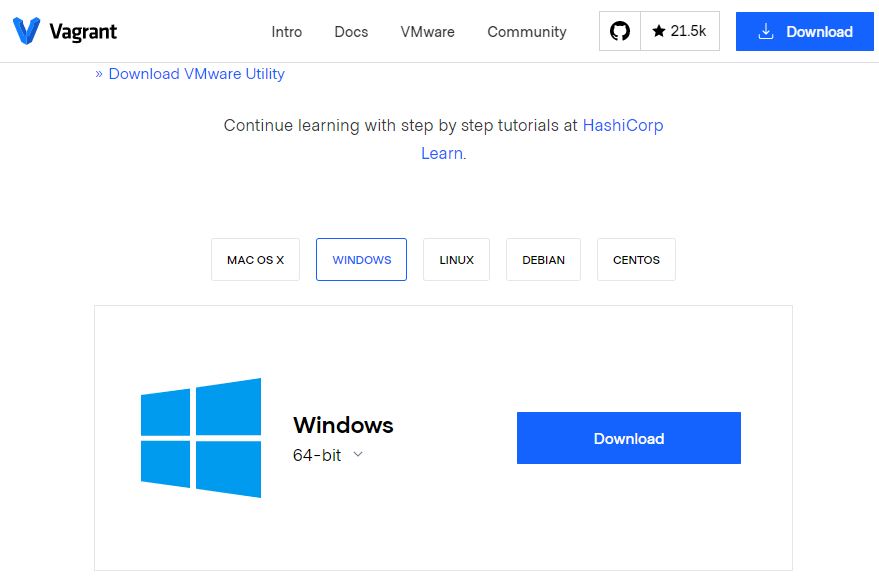
- Vagrant 설치 및 사용법 숙지
[소스]
Vagrant 로 Hyper-v에 Centos7 프로비저닝하기
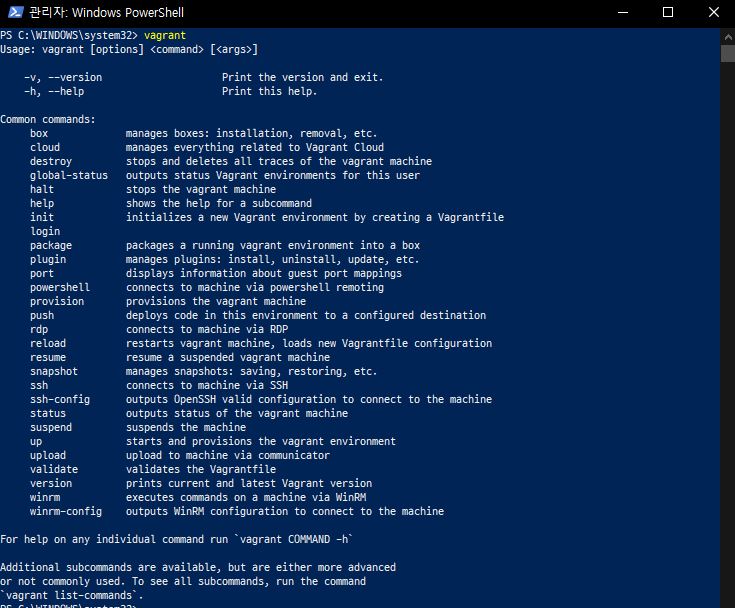
Step1 Vagrant 설치
설치 확인
vagrant -version
Step2 Hyper-V용 centos/7 box 다운로드 하기
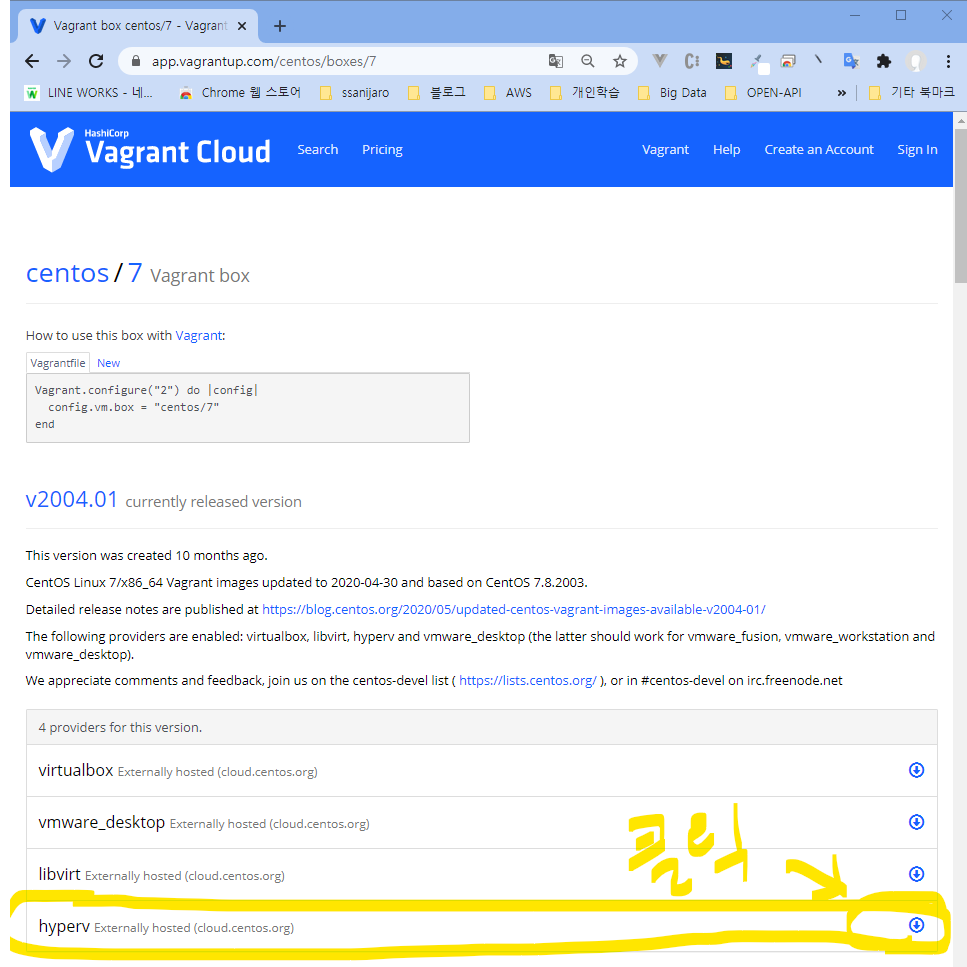
Step3 다운로드한 box add 하기
vagrant box add centos/7 file:///Q:\vs_work\infra\vagrant_box\CentOS-7-x86_64-Vagrant-2004_01.HyperV.box
Step4 Vagrant 프로젝트 생성
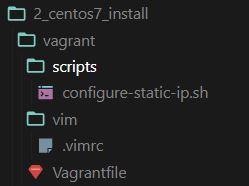
- Vagrantfile: 베이그런트 이미지 설정파일
- configure-static-ip.sh: 사설 고정IP 할당 스크립트
- .vimrc: vim 설정파일
Step5 Vagrantfile 생성
Copy&Paste를 진행하고, <비밀번호>만 사용하고 싶은 걸로 대체한다.
<비밀번호>는 root 패스워드로 설정된다
Vagrant.configure("2") do |config|
    config.vm.box = "centos/7"
    config.vm.box_check_update = true

    config.vm.network "public_network", auto_config: false,  bridge: "dmz"
    config.vm.hostname = "dzm-web1"

    config.vm.synced_folder ".", "/vagrant"

    config.vm.provider "hyperv" do |vb|
        vb.auto_start_action= "StartIfRunning"
        vb.auto_stop_action = "TurnOff"
        vb.cpus = 1
        vb.memory = 1024*2
        vb.vmname = "dzm-web1"
    end

    config.vm.provision "shell", inline: <<-SHELL
        sed -i 's/PasswordAuthentication no/PasswordAuthentication yes/g' /etc/ssh/sshd_config
        sed -i 's/#PermitRootLogin yes/PermitRootLogin yes/g' /etc/ssh/sshd_config
        sudo su && echo "<비밀번호>"  | passwd --stdin root

        # systemctl restart sshd
        # mkdir -p /root/.ssh
        # chmod -R 700 /root/.ssh
        # cat /vagrant/scripts/authorized_keys >> /root/.ssh/authorized_keys
        # chmod 600 /root/.ssh/authorized_keys
    SHELL

    config.vm.provision "shell", inline: <<-SHELL
        /vagrant/scripts/configure-static-ip.sh
        shutdown -h now
    SHELL

    config.trigger.after :up  do |trigger|
        trigger.info = "vm shutdown wating 10 seconds"
        trigger.run = {inline: "sleep 10"}
    end

    config.trigger.after :up  do |trigger|
        trigger.info = "START VM"
        trigger.run = {inline: "Start-VM -Name dzm-web1"}
    end
end
Step6 configure-static-ip.sh
고정IP 161.100.6.10 으로 설정
#!/bin/sh

echo 'Setting static IP address for Hyper-V...'

cat << EOF > /etc/sysconfig/network-scripts/ifcfg-eth0
DEVICE=eth0
BOOTPROTO=none
ONBOOT=yes
PREFIX=24
IPADDR=161.100.6.10
GATEWAY=161.100.6.1
DNS1=8.8.8.8
EOF
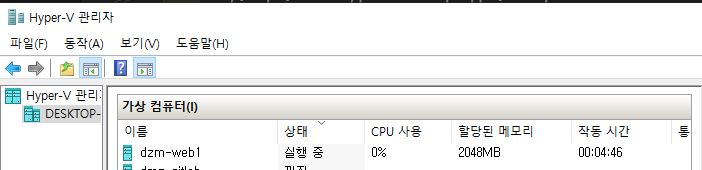
Step8 hyper-v 로 CentOS/7 만들기
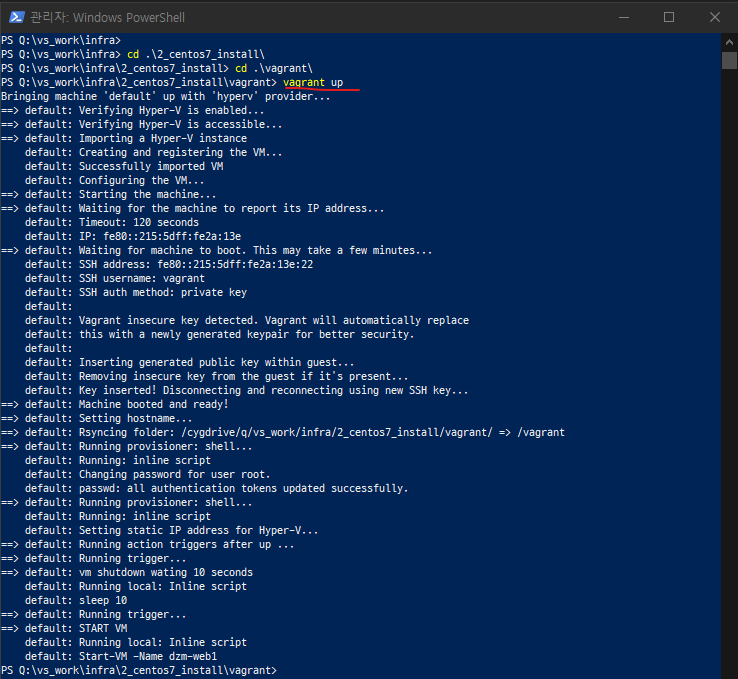
vagrant up
Step9 Console 접속
ssh root@161.100.6.10
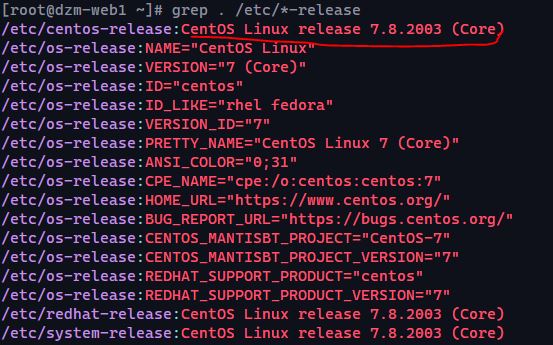
Step10 OS 운영체제 및 버전확인
grep . /etc/*-release
Step11 기본 패키지 설치 및 box export
Ingra 구성 테스트시, 매번 같은 패키지를 설치하는게 귀찮아서 아래 기본 패키지를 설치한 box 를 export 하여 사용 하자
기본 패키지 설치
yum groupinstall -y "Development tools"
yum -y vim wget curl telnet net-tools bind-utils
box export 하기
vagrant package --output CentOS-7-x86_64-Vagrant-Hyunwoo.HyperV.box
export 한 box Add 하기
vagrant box add centos_base/7 ./CentOS-7-x86_64-Vagrant-Hyunwoo.HyperV.box

Step12 만들어 진 VM 삭제
vagrant destory -f
Step13 Vagrantfile 수정
config.vm.box 의 값이 centos_base/7 으로 변경 되었고, config.vm.synced_folder의 값이 disabled: true 추가 되었다.
Vagrant.configure("2") do |config|
    config.vm.box = "centos_base/7"

    (생략)

    config.vm.synced_folder ".", "/vagrant", disabled: true

    (생략)
end
